In the modern age of digitalization and technology, education is no longer limited to classrooms. People can learn anything over the internet from the comfort of their homes, on their own schedule and pace. If you have a special skill and want to share it with others, an eLearning website is the best solution. It saves time and money and allows you to reach a vast audience.
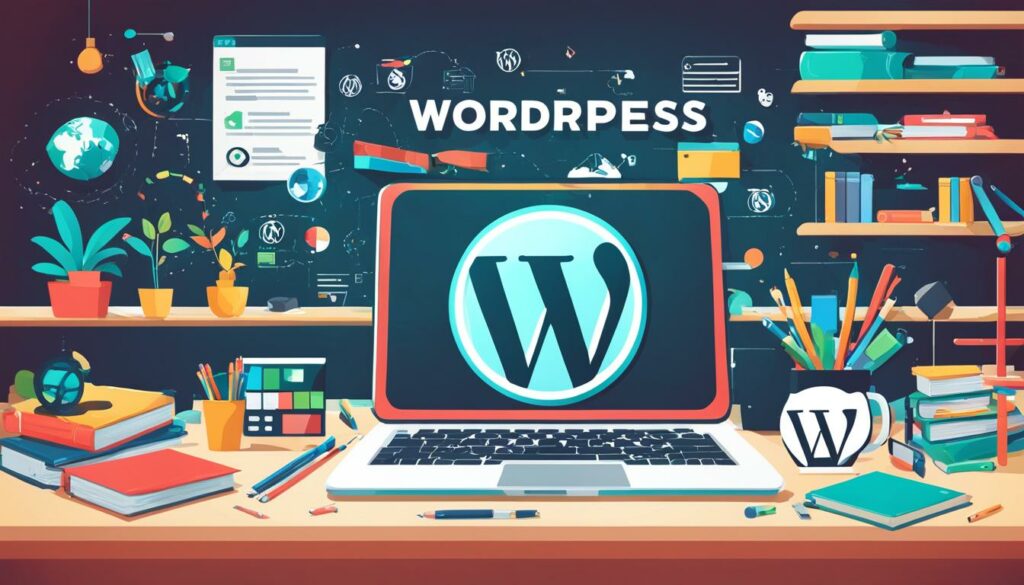
WordPress is the ideal CMS platform for building EdTech websites, offering scalability, customization, a smooth user interface, and easy setup. It is also highly SEO-optimized and affordable, making it perfect for beginners who do not have coding skills.
Key Takeaways:
- WordPress is a powerful CMS platform for building educational websites.
- It offers scalability, customization, and a user-friendly interface.
- WordPress is affordable and highly SEO-optimized.
- Creating an eLearning website with WordPress is a straightforward process.
- Consider using BoostedHost WordPress Hosting for optimal performance.
Why You Should Create eLearning Websites in WordPress
WordPress is the ultimate CMS platform for building eLearning websites. Its numerous benefits and advantages make it the top choice for educational institutions and online education. Here’s why you should choose WordPress for your eLearning journey:
Lorem ipsum dolor sit amet, consectetur adipiscing elit. Fusce non feugiat est, ac feugiat risus. Nulla facilisi. Aenean ultrices mi sit amet mauris ultrices, sed dapibus neque pellentesque. Curabitur id fermentum lorem. Sed sodales ante sit amet ipsum mollis, sed ultricies ex scelerisque. Nullam tincidunt lobortis eros quis porta.
Flexibility and Customization
WordPress offers unparalleled flexibility when it comes to designing and customizing your eLearning website. With a vast collection of themes and plugins, you can create a unique and visually appealing online learning platform that aligns with your institution’s brand and identity.
User-Friendly Interface
WordPress provides a user-friendly interface that simplifies the process of creating and managing online courses. Its intuitive dashboard and easy-to-use tools allow you to effortlessly organize and structure your course content, making it accessible and engaging for your learners.
Affordability
One of the biggest advantages of WordPress for eLearning websites is its affordability. Unlike other CMS platforms, WordPress is open-source and free to use. Additionally, you have the freedom to choose from a wide range of free and premium themes and plugins, giving you control over your budget.
Global Reach and SEO Optimization
With WordPress, you can reach a global audience and expand your educational reach beyond geographical boundaries. WordPress is highly SEO-optimized, ensuring that your eLearning website ranks well in search engine results and attracts organic traffic. This means more visibility and potential learners for your courses.
Maximize the potential of your eLearning website by harnessing the power of WordPress. Whether you’re an educational institution or an individual educator, WordPress provides the tools and resources you need to create a successful and engaging online education platform.
| Features | WordPress | Platform X | Platform Y | Platform Z |
|---|---|---|---|---|
| Flexibility | ✓ | ✗ | ✗ | ✗ |
| Customization Options | ✓ | ✗ | ✗ | ✗ |
| User-Friendly Interface | ✓ | ✗ | ✗ | ✗ |
| Affordability | ✓ | ✗ | ✗ | ✗ |
| Global Reach | ✓ | ✗ | ✗ | ✗ |
| SEO Optimization | ✓ | ✗ | ✗ | ✗ |
How to Create an eLearning Website with WordPress
Creating an eLearning website with WordPress is a step-by-step process that can be easily accomplished. By following these simple steps, you can build a professional online education platform that caters to the needs of your target audience.
Step 1: Choose a Domain Name
The first step in creating your eLearning website is choosing a domain name. Your domain name should reflect the nature of your educational institution or website and be easy to remember. Consider using keywords related to your niche for better visibility in search engines.
Step 2: Purchase a Hosting Plan
Next, you will need to purchase a hosting plan for your eLearning website. We recommend WordPress Hosting from BoostedHost for optimal performance. Sign up now through this link: www.boostedhost.com/wordpress-hosting.
Step 3: Configure Hosting Server with Domain
After purchasing a hosting plan and registering a domain, you need to configure the hosting server with your domain. This can be done by entering the nameserver information provided by your hosting provider in your domain account dashboard.
Step 4: Design Your Website with a Suitable Theme
Once your hosting server is configured, it’s time to design your eLearning website. WordPress offers a wide range of themes specifically designed for educational institutions. Choose a theme that aligns with your branding and offers the features you require.
Step 5: Install a Learning Management System (LMS) Plugin
To create and manage your courses, you’ll need to install a Learning Management System (LMS) plugin. Popular LMS plugins for WordPress include LearnDash, Tutor LMS, and LifterLMS. These plugins provide you with the tools to create engaging online courses.
Step 6: Create eLearning Courses
With your LMS plugin installed, you can start creating eLearning courses. Define the course structure, add lessons, quizzes, and assignments as per your requirements. Use the features provided by the LMS plugin to make your courses interactive and engaging.
Step 7: Integrate a Payment Plugin
If you plan to sell your online courses, integrate a payment plugin to enable smooth transactions. Popular payment plugins for WordPress include Paymattic, WooCommerce Payments, and Stripe. This allows you to accept online payments and automate the enrollment process for your paid courses.
Step 8: Launch Your eLearning Website
Once you have completed the steps above, your eLearning website is ready to be launched. Test the website thoroughly to ensure a smooth user experience, and make any necessary adjustments. Start promoting your courses and attract learners to your platform.
| Steps | Description |
|---|---|
| Step 1 | Choose a Domain Name |
| Step 2 | Purchase a Hosting Plan |
| Step 3 | Configure Hosting Server with Domain |
| Step 4 | Design Your Website with a Suitable Theme |
| Step 5 | Install a Learning Management System (LMS) Plugin |
| Step 6 | Create eLearning Courses |
| Step 7 | Integrate a Payment Plugin |
| Step 8 | Launch Your eLearning Website |
Choosing a Domain Name for Your eLearning Website
When it comes to building your eLearning website, choosing the right domain name is crucial. A domain name is the web address that users will type in to access your site, so it’s important to make it memorable, reflective of your niche, and easy to spell. Here are some tips to help you choose the perfect domain name for your online education site:
- Keep it simple and easy to remember: Select a domain name that is short, concise, and easy to remember. Avoid using complex or lengthy phrases that might confuse or discourage potential visitors.
- Reflect your niche: Your domain name should give visitors a clear idea of what your eLearning website is all about. Include relevant keywords or terms that align with your educational offerings.
- Avoid symbols and numbers: Symbols and numbers can make your domain name less universal and professional. Stick to letters and words to ensure a broader appeal.
To check the availability of your desired domain name, you can use domain checker tools provided by popular domain registration websites like NameCheap, GoDaddy, Bluehost, and Dreamhost.
Remember, your domain name plays a crucial role in creating a strong online presence for your eLearning website. Take the time to choose a domain that represents your brand and resonates with your target audience.
BoostedHost WordPress Hosting
If you’re looking for optimal performance and reliability for your eLearning website, we recommend BoostedHost WordPress Hosting. With BoostedHost, you can enjoy fast loading times, advanced security features, and excellent customer support, all specifically tailored for WordPress websites. Sign up today through this link: www.boostedhost.com/wordpress-hosting.
Purchasing a Hosting Plan for Your eLearning Website
Once you have selected a domain name for your eLearning website, the next step is to purchase a hosting plan. This is an essential step in ensuring that your website is accessible to users and has the necessary features to support your online education platform. When choosing a hosting provider, it is crucial to select one that supports WordPress installation and offers the required resources for running an EdTech website.
There are several hosting providers that specialize in WordPress hosting and cater specifically to the needs of online education sites. Some of the best hosting providers for eLearning websites include:
- GoDaddy
- Bluehost
- Dreamhost
- HostGator
These hosting platforms are known for their reliability, performance, and excellent customer support, making them ideal choices for hosting your eLearning website. By selecting a hosting plan from one of these providers, you can ensure that your website loads quickly, experiences minimal downtime, and handles high traffic volumes efficiently.
After purchasing a hosting plan, you will need to install WordPress on your hosting server. Most hosting providers offer a simple one-click installation process, making it easy even for beginners to set up their website. Once WordPress is installed, you can activate your preferred theme to customize the appearance of your eLearning website.
Remember, selecting the right hosting plan is crucial for the success of your eLearning website. Opt for a hosting provider that offers a reliable infrastructure, ample resources, and excellent performance to ensure that your website functions smoothly and provides an optimal learning experience to your users.

Comparison of Hosting Providers for eLearning Websites
| Hosting Provider | Features | Price (per month) |
|---|---|---|
| GoDaddy | WordPress-specific hosting, 24/7 customer support, optimized for performance | $5.99 |
| Bluehost | One-click WordPress installation, free domain, unlimited bandwidth | $3.95 |
| Dreamhost | Fast SSD storage, free SSL certificate, WordPress pre-installed | $2.59 |
| HostGator | Unlimited disk space, free website builder, 45-day money-back guarantee | $2.75 |
Configuring Hosting Server with Domain for Your eLearning Website
Once you have purchased a hosting plan and registered a domain for your eLearning website, the next step is to configure the hosting server with your domain. This process allows your website to be accessible using the domain URL, ensuring a seamless user experience. Follow these steps to configure your hosting server with the domain in WordPress:
1. Obtain Nameserver Information from Your Hosting Provider
After purchasing the hosting plan, your hosting provider will provide you with the necessary nameserver information. This information includes the nameserver addresses that you need to configure for your domain.
2. Access Your Domain Account Dashboard
Log in to your domain registrar’s website and navigate to your domain account dashboard. The process and interface may vary depending on the domain registrar you used.
3. Configure Nameserver Information
In your domain account dashboard, locate the section for managing DNS or nameservers. Here, you will have the option to update the nameserver information for your domain.
- Remove any existing nameserver entries if present.
- Add the nameserver addresses provided by your hosting provider.
- Save the changes to update the nameserver settings for your domain.
It’s important to note that the changes may take some time to propagate throughout the internet. This process usually takes around 24 to 48 hours, although it can vary. During this time, your website may not be accessible using the domain URL.
Once the configuration is complete and the changes have propagated, your eLearning website will be accessible using the domain URL. Make sure to test the website on different devices and browsers to ensure smooth functionality.
In the next section, we will explore the process of designing your eLearning website with WordPress, customizing themes, and creating a visually appealing online education site.
Designing Your eLearning Website with WordPress
Now that your domain and hosting are set up, it’s time to dive into the exciting process of designing your eLearning website using WordPress. With WordPress’s versatile features and wide range of customization options, you can create a visually appealing and user-friendly online education site that captivates your audience.
Start by choosing a theme that is specifically designed for eLearning websites. Look for themes that offer a clean and intuitive layout, easy navigation, and built-in features for displaying your courses and educational content. One popular theme for eLearning websites is the Tutor Starter theme, which provides a modern and professional design.
After selecting a theme, customize it to match your brand and educational institution. Use WordPress’s intuitive customization options, such as the built-in Customizer, to personalize your website’s colors, fonts, and layout. Add your logo, branding elements, and engaging visuals to create a cohesive and visually appealing online presence.
For a quick and easy start, you can also consider using plugins like TutorMate, which allows you to import demo design templates. These templates provide a pre-designed layout that you can customize further to suit your needs. It saves you time and effort, while still giving you the flexibility to create a unique and visually stunning eLearning website.
Example: Customizing the Tutor Starter Theme
With the Tutor Starter theme, you have the freedom to customize various aspects of your eLearning website. The theme offers multiple customization options, including:
- Header and footer layouts
- Color schemes
- Typography settings
- Course listing and single course page layouts
By utilizing these options, you can create a website that reflects your institution’s branding and captures the attention of your target audience.
| Customization Options | Description |
|---|---|
| Header and Footer Layouts | Choose from different header and footer designs to create a unique look for your eLearning website. |
| Color Schemes | Select the color palette that aligns with your institution’s branding and creates a visually harmonious experience for your learners. |
| Typography Settings | Customize the fonts and typography on your website to enhance readability and convey your brand’s personality. |
| Course Listing and Single Course Page Layouts | With the Tutor Starter theme, you can choose from various layouts to showcase your courses in an organized and engaging manner. |
By customizing your WordPress theme and leveraging its features, you can create an eLearning website that not only looks visually appealing but also functions seamlessly to deliver an exceptional online learning experience.
Installing a WordPress LMS Plugin for Your eLearning Website
To create and manage courses on your eLearning website, you will need to install a Learning Management System (LMS) plugin. This plugin adds the necessary functionality to your WordPress site, allowing you to deliver online courses and track student progress.
There are several popular LMS plugins available for WordPress, each with its own unique features and benefits. Here are three noteworthy options:
- LearnDash: LearnDash is a powerful and versatile LMS plugin that offers a wide range of features for course creation, student management, and assessment. It provides a user-friendly interface and supports various media types, making it ideal for creating interactive and engaging courses.
- Tutor LMS: Tutor LMS is a lightweight yet feature-rich LMS plugin that simplifies the process of creating and selling online courses. It offers advanced course management capabilities, a drag-and-drop course builder, and comprehensive reporting options.
- LifterLMS: LifterLMS is a comprehensive LMS solution that allows you to create, sell, and protect online courses. It integrates seamlessly with popular WordPress themes and offers powerful features such as progress tracking, quizzes, and gamification elements.
When choosing the right LMS plugin for your eLearning website, consider factors such as ease of use, compatibility with your theme, available support, and the specific features you require. You can install your chosen LMS plugin directly from the WordPress plugin repository, following the installation instructions provided by the plugin developer.
Once installed, your LMS plugin will transform your WordPress site into a fully functional online learning platform. You can start creating and organizing your courses, managing enrollments, and tracking student progress with ease.
Creating eLearning Courses with a WordPress LMS Plugin
Once you have installed an LMS plugin, you can start creating eLearning courses on your WordPress website. Each LMS plugin will have its own course creation process, but generally, you will need to provide course details such as title, description, content, and course settings. You can also add quizzes, set enrollment limits, and evaluate student performance. The LMS plugin will provide a user-friendly interface for managing and organizing your courses.

Step-by-Step Guide:
- Access your WordPress dashboard.
- Locate the LMS plugin you installed (e.g., LearnDash, Tutor LMS, LifterLMS).
- Click on the plugin’s settings or course creation option.
- Provide the course title, description, and content.
- Set the desired course settings, such as duration, prerequisites, and visibility.
- Add quizzes or assessments to measure student progress.
- Define enrollment limits if applicable.
- Configure grading or certification criteria.
- Preview and save your course.
- Repeat the process to create additional courses.
Tip: To make your course creation process efficient, outline the structure and objectives of your course beforehand. This will help you organize the content, create meaningful assessments, and ensure a clear learning path for your students.
Integrating a Payment Plugin for Selling Online Courses
If you plan to sell your online courses, it is essential to integrate a payment plugin with your Learning Management System (LMS) plugin. This allows you to accept payments from students and automate the enrollment process, eliminating the need for manual course assignment. WordPress offers several popular payment plugins that seamlessly integrate with LMS plugins, providing a smooth and secure online payment experience for your customers. Here are three recommended payment plugins for selling courses with WordPress:
- Paymattic: Paymattic is a robust payment plugin designed specifically for WordPress eLearning websites. It supports various payment methods and enables you to accept payments in multiple currencies. With Paymattic, you can easily set up pricing plans, create discounts, and manage subscriptions for your courses.
- WooCommerce Payments: WooCommerce Payments is a popular choice for WordPress users. With its seamless integration with WooCommerce, the most widely used eCommerce plugin, you can quickly set up a secure payment gateway for your online courses. WooCommerce Payments provides extensive features like customizable checkout pages, integrated fraud protection, and support for various payment methods.
- Stripe: Stripe is a trusted payment gateway that offers seamless integration with WordPress. It allows you to accept credit card payments directly on your website without redirecting users to an external payment page. Stripe is known for its developer-friendly features, advanced security measures, and customizable checkout options.
To integrate a payment plugin with your LMS plugin, follow these simple steps:
- Choose your preferred payment plugin from the WordPress plugin repository or official websites.
- Install and activate the payment plugin on your WordPress website.
- Configure the settings of the payment plugin, such as API keys, payment methods, and currency options.
- Link the payment plugin to your LMS plugin by following the integration instructions provided by both plugins.
- Test the payment process to ensure that payments are successfully processed and students are automatically enrolled in their purchased courses.
Integrating a payment plugin with your LMS plugin simplifies the entire payment and enrollment process, enabling you to efficiently sell your online courses to a global audience.
Best WordPress Education Plugins for eLearning Websites
Enhance the functionality and user experience of your eLearning website with these top WordPress education plugins. Whether you’re an educational institution or an individual educator, these recommended plugins offer a wide range of features to create a comprehensive eLearning solution. Explore the must-have plugins for your WordPress education site:
Sensei LMS
Sensei LMS is a powerful plugin that allows you to create and manage courses with ease. It offers features such as course management, student progress tracking, and quiz creation. With Sensei LMS, you can create interactive and engaging eLearning content to meet the needs of your learners.
LearnDash
LearnDash is one of the most popular WordPress LMS plugins, trusted by educational institutions around the world. It provides a robust set of features for course creation, enrollment management, and student progress tracking. LearnDash offers customization options and seamless integration with other WordPress plugins, making it a top choice for eLearning websites.
Tutor LMS
Tutor LMS is a comprehensive learning management system that simplifies the process of creating and managing online courses. It offers features such as course management, student enrollment, and content drip feed. Tutor LMS also provides built-in tools for assessments and student communication, ensuring a seamless learning experience.
LearnPress
LearnPress is a free and user-friendly LMS plugin that allows you to create and sell online courses. You can customize the appearance of your courses, manage student enrollments, and track their progress. LearnPress also offers add-ons for advanced functionality, such as content dripping and certificates, making it a cost-effective choice for eLearning websites.
These plugins offer essential features to create an engaging and effective eLearning experience. Choose the ones that best suit your needs and budget to build a successful WordPress education site.
You can boost the performance of your eLearning website with WordPress Hosting from BoostedHost. Sign up now through this link: www.boostedhost.com/wordpress-hosting.

Conclusion
WordPress is the ultimate platform for building eLearning websites for educational institutions. Its scalability, customization options, and user-friendly interface make it a top choice for educators and trainers. With WordPress, you can create a dynamic and engaging eLearning website that meets the needs of your target audience.
By leveraging WordPress themes, plugins, and payment integrations, you can design a website that is visually appealing, interactive, and optimized for online learning. The affordability of WordPress also makes it an ideal choice for educational institutions with budget constraints.
Don’t miss out on the benefits of WordPress for your educational website. Start exploring the possibilities today and unlock the power of online learning. For optimal performance, we recommend WordPress Hosting from BoostedHost. Sign up now through this link: www.boostedhost.com/wordpress-hosting.
FAQ
Q: What are the benefits of using WordPress for eLearning websites?
A: WordPress offers scalability, customization options, a user-friendly interface, and affordability, making it an ideal CMS platform for educational institutions.
Q: How do I create an eLearning website with WordPress?
A: The process involves choosing a domain name, purchasing a hosting plan, configuring the hosting server, designing the website, installing a Learning Management System (LMS) plugin, and creating courses.
Q: How do I choose a domain name for my eLearning website?
A: Select a domain name that is easy to remember, reflects your niche, and is easy to spell. Avoid using symbols and numbers.
Q: Which hosting provider should I choose for my eLearning website?
A: Popular hosting platforms for WordPress include GoDaddy, Bluehost, Dreamhost, and HostGator. Choose a provider that supports WordPress installation and meets the necessary requirements for your website.
Q: How do I configure the hosting server with my domain?
A: Your hosting provider will provide you with nameserver information. Configure the nameserver information in your domain account dashboard to connect your domain to the hosting server.
Q: How do I design my eLearning website with WordPress?
A: Choose a suitable theme, customize it to your liking, and start designing web pages. You can use plugins like TutorMate to import demo design templates for a quick and easy start.
Q: Which Learning Management System (LMS) plugin should I install?
A: Popular options include LearnDash, Tutor LMS, and LifterLMS. Choose the plugin that best suits your needs and install it from the WordPress plugin repository.
Q: How do I create eLearning courses on my WordPress website?
A: Install an LMS plugin, provide course details such as title, description, content, and settings, add quizzes, set enrollment limits, and evaluate student performance.
Q: How do I integrate a payment plugin for selling online courses?
A: Popular payment plugins for WordPress include Paymattic, WooCommerce Payments, and Stripe. Choose a plugin that supports your preferred payment methods and integrates seamlessly with your LMS plugin.
Q: What are the best WordPress education plugins for eLearning websites?
A: Some popular options include Sensei LMS, LearnDash, Tutor LMS, and LearnPress. These plugins offer features such as course management, student progress tracking, and quiz creation.
Q: Why should educational institutions choose WordPress for building eLearning websites?
A: WordPress offers scalability, customization options, a user-friendly interface, and affordability, making it the ideal platform for building dynamic and engaging eLearning websites.